Showing posts with label creative experiments. Show all posts

Saturday, 26 September 2020

Moulds, Molds, Bears, Giant Babies and The Cautious Emergence of The Weirdly Absurd


Well, I've been doing the usual thing, neglecting this blog and manically experimenting/pottering. 
Allowing that it is possible to potter manically of course - I'm taking the view that it most certainly is. .

The trouble is, as I have probably mentioned before, is that my focus shifts so quickly between projects and ideas that I am into a new idea before I have blogged about the last one. Then eventually, the weight of unblogged about things becomes so great that my Blogger's Guilt kicks in and I try to feature about ten ideas at once. 

Oh well, so be it ;-)


So, first up - You remember the plastic model railway figures from my last post? Course you do. I have made a few more little surreal scenes using them, (in this case some very nice hurrying passengers) and a few very pink plastic babies I came across on the internet (of course). Combined with an image transfer of one of my digital fake-cell-structure creations and a few other bits and pieces this interesting little scenario came about. It's called "Try to ignore The Babies".


Taking this post to be a vaguely logical progression, I considered said plastic babies and wondered how making polymer clay moulds of  them might work out. Polymer clay does seem to be pretty good for mould making. Non-flexible ones but that is OK. This Baby/Alien piece was made using crude impressions from one of the moulds I made. With some crackle effect technique and additional glass beads. (I was given a box of various small beads from a friend. I didn't think they were the sort of thing I would be using but as it happened they found a place)


One mould led to another, this time using a couple of model railway figures, which, my creative process being what it is, resulted in some pieces with a very different vibe. Using inks and Ren wax etc etc helped.


As is the way of these things, before long, some of my little plastic animals got roped in to the mould making frenzy. These two little Red Panda head drops came about that way. 


And this Bear pendant. All interesting stuff I thought.


And moving skilfully on, like a smooth radio DJ style link, talking of bears, I made some bear images using a rubber stamp I acquired, and taking sort of multiple, artily out of register monoprints from the stamp's impression on poly clay, which I coloured up in various ways. 
I used one of these images as the background for this piece called "Big Bear, Good Dog" ;-)


Moulds from the heads of various plastic figures I have had knocking around for years came into the equation also, to somewhat creepy effect. Only somewhat, as the absurd tends to trump the creepy; in the work I do at any rate. Here's a couple of spike beads and drops to emphasise my point.


The more observant amongst you will have clocked the strange image at the top of this post. This was me trying to mix and match heads and bodies ;-) The body is from a mould of an unpainted pottery dog blank that I acquired from who knows where, ages ago, and the head is from a plastic motorcyclist. the result is like some very odd artifact from an archaeological site somewhere. No idea idea where that 'somewhere' might be though. . .

So that's me for the moment. Other stuff will no doubt emerge from my fevered brain as this strange time of Covidiosyncratic Groundhog Days grinds on, and on.

Oh well, and talking of 'well', stay well!

best, 

Jon x


Saturday, 23 March 2019

Spikes Revisited, It's Not The Putting On It's The Wiping Off, More Beads and Happy Accidents


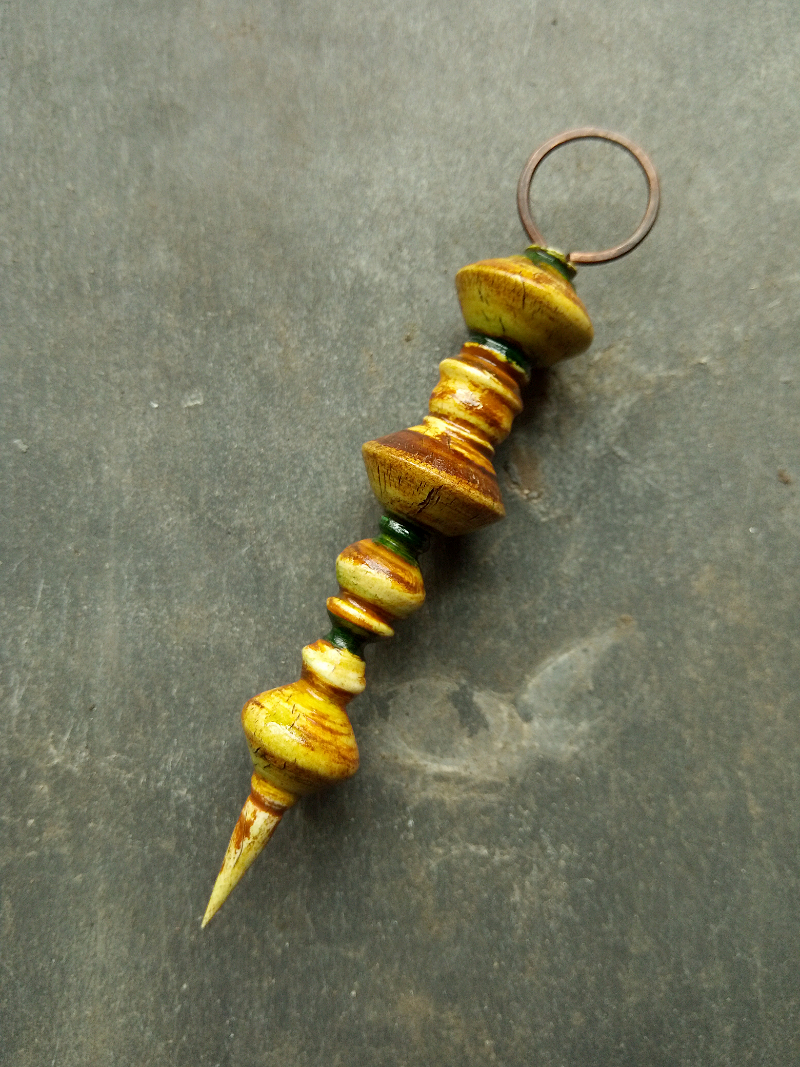
After a few months of working on other things, I had an urge to make some more spikes using my turned look technique. They always sold well so that was another reason to return to them. 

I never quite know what colours I will use until I start painting, and because I use alcohol inks I have the option of layering colours and diffusing them with rubbing alcohol. You can get nice blends this way.

The other cool thing about alcohol inks is that they subtly and not so subtly change colour when diluted. They seem to be dye based and have a sort of base colour that lies under the main colour which is revealed when you paint over it with rubbing alcohol, or a paler ink colour. For instance, some shades of brown revert to a sort of light blue, which seems strange but can look good.

I also find that wiping the ink off gently with a cloth reveals this under/base colour too. It also is a way of softening the hard line that forms where two areas of ink meet. It's fun to experiment with this, and that way learn a bit about the quirks of the medium. You can then use said quirks to your advantage.


I have been messing about with acrylic paints and acrylic inks too. Combining them with alcohol inks and wiping bits off here and there. An idea triggered by what turned out to be a happy accident with some rubbing alcohol ;-)
It's a bit drastic at first but a gentler touch makes the effect a bit more subtle. I'm a bit obsessed with it right now so various distressed looking beads and spikes will no doubt appear in my listings before long. . .
Oh yeah, and I also found a good background to photograph things against. An old roofing slate from the treasure trove of inspiration that lurks behind our shed. . ;-) It makes colour matching in Pshop or equivalent so much easier too, white backgrounds are OK but they are a pig to get right colour wise. So many of my shots against white had a pinky tinged or a bluey tinged background even though the bead colour was pretty accurate.


Thanks for checking out the way my work is heading. More in about a month's time.
best,
Jon x


Friday, 18 January 2019

Having a Bit of a Turn, Going For The Throat, Getting it in the Neck, Hanging by a Thread, etc etc. . .


In a moment of inspiration, I actually thought of something for my wife to get me for Christmas just passed. I find that just one of the many downsides of being all grown up (technically at least) is that you struggle to find anything you actually want for Christmas. Anything within a reasonable price bracket anyway. Grown ups are so boring. . .

Talking of which, I actually asked my kids to get me some slippers this year, sheesh, what happened to me??

But contrary to expectation, this festive season found me prepared.
"I'll have one of those cheap Chinese micro-lathes" I said. "Please."
And that's what I got ;-)

I've only had a bit of a play with it so far, but it's pretty good. All I want to do with it is cut groovy grooves in polymer clay, or wooden beads, which is relatively undemanding. I tried it on some wooden beads I picked up in a charity shop a while ago, and once I had stopped the bead from slipping too much it worked OK. (I need something called a 'drive centre', I'm looking into it but for now I am using a countersink from my power drill which works up to a point. .)

I seem to have gone all vibrant, colour wise. . . hmmm. .

I made some experimental, randomly grooved beads, which I then painted with alcohol inks and varnished. I like how they came out even though they soaked up the varnish somewhat. I will make some plain poly clay tube beads to experiment on next. As well as scouring the charity shops for more wooden beads to mess up of course.

A double grid, ancient lino, plastic sleeving and early JBD experimental poly clay claws. Kind of Industrial Gothic

The other thing I have been slowly venturing towards is making actual necklaces using my eccentric grid based pendant focal things. Rather than selling them on for other people to have all the the fun, I have been considering how I would hang them myself, in a way that is a bit more arty and considered than just sticking them on a bit of chain.

Modelled by Ethel, the dummy retrieved from the local dump for £2 a year or two ago.The last of the big spenders, me. .

Well, that said, I have actually stuck one or two on some simple chain, but chain that consists of large, artily crude, home made (by me) links that suit the vibe of the piece. Using plain copper or upcycled garden wire hammered flat(ish) for strength and because I like how it looks.

A large image transfer poly clay square with some double sided through drilled squares that matched the colour

 I am encouraged by the results and am considering trying to sell some pieces. I admit to feeling somewhat intimidated by this prospect, as the subject of price rears it's contentious head. . .

Ethel again, showing you how it should be worn

Also, I am not entirely sure where to sell. I need to research some Facebook groups I think and ask around for some feedback and advice. Any thoughts you may have on the matter would be gratefully received ;-)

So here are some more things I have been working on. . .

Enjoy. .. and see you next time,
Jon x

Electronic components, a poly clay im trans square and a plastic railway figure

A bit long maybe?

Two fuses and a big electronic whatsit in a nice shade of blue

Copper links this time

Thursday, 3 January 2019

Blog Neglect Hits new Heights, Ideas are Everywhere, Including the Strange Case of The Mirrors and The Guinea Fowl,

The New Year's Eve gig we played at our local pub had a masked theme, so I spent a happy half hour knocking up this fake primitive mask out of some packaging I had lying around and some acrylic paints. I couldn't really see to play while wearing it, so it didn't stay on long ;-)

Well, first things first - Happy New Year!

May it be full of love, light and creativity and all that stuff. . .

I have been pretty busy with all sorts of things over the last month or two, and as a consequence, not really in the mind set to write blog posts. When you are busy, some things have to be put aside, and as blog posts are a kind of ephemeral extra, they tend to be victim number one.

Victim number two, though by no means an ephemeral extra, has been bead making. I took the opportunity to take a break, as cramming in the the odd hour or two in my workshop, between serious DIY and catering for Xmas guests is not really useful or satisfying.
A break meant that I could take stock and do the New Year thing of taking a step back and looking at where I am and what direction I might take next. This break also meant sacrificing a couple of week's potential earnings, but you can't make the proverbial omelette without breaking eggs. . . Well, you could try, but it wouldn't be any entirely sane person's idea of an omelette really. . .

Some of the serious DIY I have been busy with. Faux panelling with corbels and bits. The right hand door has since been replaced and stained etc, and the wall behind the clock is a gingery dark brown. Very cozy and old looking.

So here I am, somewhat shamefacedly blogging again. Thank you for your patience ;-)

As you may have noticed over the months, my work often goes off on tangents, triggered by something I just discovered by accident, or just came across in the course of day to day life. Sometimes a process, sometimes an object or type of material. I have developed an instinct for noticing potentially useful happy accidents, and due to the positive response I get, the confidence to pursue them further.

Mirror shard, poly clay backing, blue alcohol ink, copper bail

So when I accidentally broke the mirror we had put out in the garden for the Guinea Fowl it triggered an idea. . .
Wait a minute, you put out a what?
It's a bit of a long story, but I will be as concise as I can.

We have two guinea fowl which potter about our large garden and the surrounding area, including neighbour's gardens. Everyone seems OK with this as they are harmless and quite amusing to watch if not to listen to (!).

Everyone that is except our immediate neighbour who was a touch upset by their habit of pecking at his patio doors and leaving a bit of a mess on his doorstep from time to time. Was there anything we could do about this, he wondered.

Well, other than having a quiet word with them, which wasn't an entirely serious idea, or getting rid of them, which was out of the question, we couldn't really come up with anything. So we did a bit of research.

Guinea Fowl are social creatures and live in quite large flocks in the wild, so we wondered if the reason they were hanging out by, and pecking at the windows was because seeing their reflections made them think they were amongst other Guineas.
So as an experiment we put a couple of spare mirrors we happened to have left over from our house move, out in the garden.
This did seem to get their attention, and they did spend time in front of the mirrors so we hoped for the best.
The neighbour hasn't complained since, but he has found a new partner recently, which might have mellowed him out a bit ;-)
(he looks after two boys in their early teens on his own, which must be a bit stressful)

So crossing fingers, that has amicably solved that little issue.

Not easy to photograph any of these mirror thingies. . . The copper came out looking a bit brassy in this pic

Now, to the happy accident part.

One of the mirrors was leant against our household compost bin. This bin is rather full and the seams are opening up somewhat. It needs emptying but I figured a well aimed kick might help close it up a bit. Only it wasn't a well aimed kick, it caught the mirror and smashed it to bits. (it was cracked already to be fair, so I didn't claim my 13 years bad luck). I was on my way to the waste bin with said bits when I had a 'Hmmm. . I wonder.  ." moment and headed for my workshop instead.


A mirror is basically a sheet of glass with silver nitrate on the back, so, I figured, that backing could be scraped off in such a way as to make interesting patterns. I carefully broke off some small bits of mirror and reached for the Dremel and the grinding bits.
It worked quite well, (I quickly realised I should wear a face mask as inhaling fine glass dust is not such a great idea.) so I made a few drops/charms using this technique. Extending the process to involve polymer clay backing, both coloured and non coloured.

I'm enjoying these little 'man' motifs. Kind of petroglyph - ish ;-)

So there you have it, how Guinea Fowl related disruption can lead to creative innovation of a modest kind ;-)
Which supports my long held belief that the wonder of life has a lot to do with it's random and absurd moments. . .
Until next time, which will not involve a wait as long as the last time,
Cheerio
Jon x


They combine nicely with other objects, so you may see more of this sort of thing in the next few months

Thursday, 29 March 2018

The Discomfort Zone, Images and Textures, Free Wire and a long awaited Farewell to The Turquoise Toilet. . .


Well, I've been experimenting again. Tearing myself away from the relatively safe/unadventurous option of making stuff that has proven sales potential, and instead, working on following up a few hunches and seeing what spur of the moment options reveal themselves as ideas develop, or falter. . .

Ironically, I find being in my comfort zone, uncomfortable. ;-) 

So I have been playing with textures again. An aspect of my work that I have neglected somewhat of late. I had also been turning my mind to the idea of beads on the end of longer wire loops, so combining the two things led to the semi circular, embossed beads on various length loops that you can see pictured here.


The texture is made using an Indian, hand carved printing block I picked up for a couple of quid

I had spent some time a few days ago, playing with image transfer ideas, basically, transferring images onto other poly clay shapes. By which I mean doing things like transferring round images onto square bead shapes etc. It worked quite nicely, and I will revisit at some point.

I tried some non distressed looking ones, but distressed looked so much better. And more 'Me'. .

The reason I mention it is that I had often vaguely wondered whether you could transfer an image on top of a texture, in such a way that the image only transfers onto the raised parts of the design.

Well it turns out that you can. You just need to use a bit more water when rubbing the paper off the back of the image, and use a fairly deep, simple texture. A lot of scope for experimentation right there. . .

Image transfer over texture. Plus alcohol inks.

Another subject of my vague wonderings was whether I could combine an image transfer element with a 'turned look' one. Early days but that seems reasonably possible. Wire down the middle is needed to provide strength to the join, but it's looking promising.

A fairly crude, early example

And now, the bit you've all been waiting for, - Free Wire!

I snaffled some cast-off electrical cable from a skip the other day. Wire used for higher voltage stuff like mains wiring is solid copper. It is too thick to be used for ear wires, but is great for loops and such. It isn't coated so it oxidises well. It comes in varying thicknesses too. Just cut the plastic away and there you are. Electricians just throw their off cuts and old wiring away.

I haven't tried using the bunched, very thin wires you get in normal TV etc cables for anything yet, but it may have it's uses. Upcycling rules!

Free electrical wire in action

So that was my concerted bit of experimentation and comfort zone escapology. The trouble is that every discovery sparks a dozen other new possibilities to follow up. Not enough hours in the day, especially when you have serious DIY to do as well. . .

The 1970's turquoise acrylic bath, (complete with crack) and related turquoise sink and toilet, lurking in all its glory in our upstairs bathroom since previous occupants of this house installed it, (in the 1970s I assume) has been retired to the local dump. 
I am busy fitting a new 'traditional' style suite more in keeping with the feel of the house. Much as I appreciate retro style, it has to be said that there is both good and bad retro. A hideous, and frankly, knackered, turquoise retro bathroom doesn't really fit our aesthetic - snobbish, pretentious arty types that we are ;-)

Jon x