Saturday, 21 February 2015

SEO and suchlike

So this is my latest semi obsession, SEO or Search Engine Optimisation. It seems to be the thing you have to do to get more views from outside Etsy, which is something I haven't been getting much of.
It's to do with 'keywords', words that people use to 'find' your shop or items for sale. If you can second guess what they might type in to the search bar on Google or somesuch, and make sure that word or phrase is in your title and description, then you stand a good chance of getting on the first one or two pages of that google search. In theory anyway. It gets horribly complicated the more you go into it. Not surprisingly there is a whole industry built around SEO with it's own gurus and ubergeeks to help you succeed. . . .

It all seems a world away from making nice things and trying to sell them. . .


But there is a way of finding what keywords are popular, or rather trying out your ones and seeing if anyone used those words in a Google search, and if so, how many did likewise. You can go to Google Adwords keyword planner and sign up (without having to spend anything), which gives you access to a text box in which to type your keyword or phrase. The number of searches using that phrase comes up in the results list. It's interesting stuff, with some words being madly popular and others drawing a big fat zilch. It's not always predictable and you will often find that your item title in Etsy has a lot of entirely unproductive words in it.
Then to get found on Etsy, you have to have keywords and phrases that people use on there too. You can test keywords by typing them into the search bar and seeing how many results come up. It tells you at the top of the page.
It all gets confusing because the phrases that got zilch on Google can often get you thousands of results on Etsy search. . .

example - 'Boho jewelry'  9,900 on Google - 267,000 results on Etsy
or           - 'Rustic Necklace' 170 on Google - 30,000 results on Etsy

Not quite comparing like with like so I might be drawing wonky conclusions . . .

So really, I don't quite know where I am with all this. I'm giving it a go anyway. I'm trying to use some phrases for google and some for etsy in the titles of my items.
I guess the holy grail is to get people to your Etsy shop via Google, while at the same time making it easy for those who went straight there without your help, to find your stuff.
I think it takes a while for any changes to filter through the system Google wise, so I will just have to see if my views improve over the next week or three.
My brain hurts. . .

Sunday, 15 February 2015

Surface treatment - When does 'Distressed' become 'Messed up'?

Is there actually a dividing line? I am really enjoying seeing how close to total irreparable messed-up-ness I can take my image transfer bead 'ageing' process. It's a learning curve, and once you have taken a process too far, you can take a more informed view on how far to take it the next time.

Here's how things start out. Images transferred onto poly clay squares, in this case, using dye sub paper and kato trans liquid. This shot is after baking, obviously. You get a slightly fuzzy, out of focus effect, and some randomly dodgy edges. All of which is fine, as it all adds to the finished look. Neatness can be achieved with more care, if neatness is your thing.


Here's a shot of my desk with some of the above as finished beads, after the 'distressing' or 'messing up', (whichever it is deemed to be) process.


A closer view of the greeny brown ones. Sanded quite hard, as scratching Kato clear is not as easy as plain baked clay. Also, the scratches aren't visible until some darker ink/paint/whatever is applied and encouraged to sink into them.


This is what happens when the process is taken a bit further. These beads are slightly different in that the image trans process was the more usual one using a laser copy/print and water on plain white clay, or a 10% kato trans, 90% white poly clay mix. (Images 'stick' better with a bit of trans clay in the mix).
As there is no liquid clay involved, the surface scratches and distresses more easily. The image comes out sharper than the dye sub ones too. The other thing that happens with this method is that when Renaissance Wax is used at the end of the process, and rubbed in, it starts to dissolve the image. If you apply it carefully and leave it to dry for half an hour or so, it will buff up without too much of the image disappearing, but if you rub it in hard and buff up after a couple of minutes a fair bit of the image is removed. I like both effects. The top left bead has almost entirely lost the image, but looks cool all the same. imho.


These next ones are where it gets close to or over the dividing line between 'distressed' and 'messed up' that I am wittering on about. I like the kind of 'ghost image' of the pattern in red that gets left on the two on the right. This technique does make me wonder whether I should make some beads with no image on them at all, just madly messed up surfaces. I like the look, and losing the image, as in the bottom left bead, doesn't detract from it's coolness all that much. But overall, the ones where the image is still reasonably discernible are my favourites. How 'bout you?


Wednesday, 11 February 2015

Clayhem, no more. . .


BEFORE - working with a bit of MDF sat on top of an open drawer as a work surface, with all the random boxes of stuff strewn around. Not to mention the tatty curtains, bits of 80's recording gear, guitar cases and boxes of blank tiles and coasters etc etc etc etc etc etc in the background. . .


AFTER - makeover time. . . I put this spare washstand/writing desk in the corner (top left in the clayhem pic), put a bit of foamboard on top to protect it, stuck a big tile I rescued from the dump on top to work on and arranged all the things I use most around that. The best thing is that I can leave them all there and come back to them as and when I have time/motivation. The shelving on the left is where the beads, clay, texture sheets and wire etc live, in various "Wham boxes" (which seem to be in shops everywhere these days). I'm addicted to storage boxes with compartments now. . . Pliers and other tools are in the drawer on the right, printed images in the drawer on the left.
The fast food container that seems to contain a urine like liquid is actually full of water that was used to clean yellow acrylic ink off a brush in case you were worried, or thought I had a secret ingredient in my work. . . I also use it to cool beads out of the halogen oven (floor, bottom left)
Notice the new curtains (OK, not new, charity shop, six full length velvet curtains for £25. Result!) and notice that I painted the wall, whoo! . . .

This is all part of getting the house in order so we can sell it in a month or two, but whatever the motivation it's nice to have a dedicated workspace for claying and jewellery work.

The interesting and unexpected knock on effect of all this order imposing activity is phychological. I feel calmer, and more in control now that I occupy a more ordered space. I wasn't aware of feeling particularly stressed or depressed before but I am aware of not feeling that way so can only assume that I must have been feeling that way to some extent. Well well. . .
cheers,
Jon x

Sunday, 8 February 2015

Hi, my name's Jon and I am a complete pillock. .

Anyone got a link to Pillocks Anonymous? I need to find a local support group.
For why? Well, I just managed to send a buyer a set of orange and black disk beads when actually they had ordered the yellow and silver ones. . I only find out my mistake when somebody bought the orange and black ones today and I couldn't find them. Funnily enough, I did find the yellow and silver ones. . . duh. . .

The orange and black ones

The yellow and silver ones


Oh well, the buyer was very nice about it. I am going to make her a set of very similar beads, as long as I can remember what I did the first time ;-) And the original buyer gets to keep the wrong beads and gets the right beads sent off tomorrow. .

But apart from the display of pillockness on my part, my Etsy shop seems to be taking off in it's own small way. I have sold 8 or so bead sets in the last couple of weeks, which counts as a wild flurry of activity in my world. I'm really pleased. let's hope it continues.

Sold these the day after I listed them. Flippin' 'eck. .

Wednesday, 4 February 2015

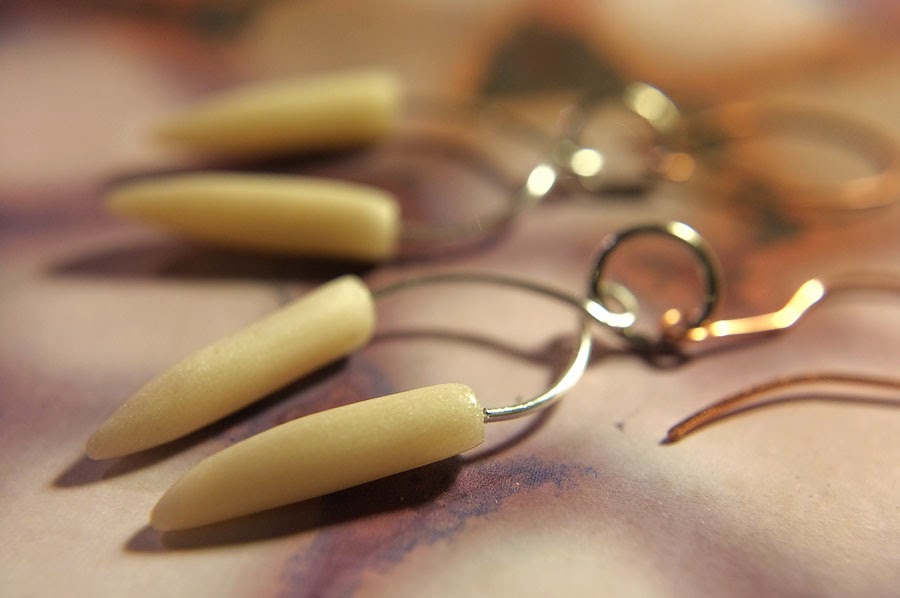
A somewhat eccentric macro set up. . .


I've been messing around with close up shots for a while, using some a couple of add on lenses that had been lying around from when I had my previous camera. I kept wanting to get closer so when I noticed a cheap set of macro lens add ons on ebay I thought 'Why not?'. I mean, how bad can they be? with a 12 megapixel camera any photos will be much, much bigger than is needed for product shots and the like, so any lack of high end quality is pretty irrelevant. I'm not going to be printing anything big anytime soon, or probably ever, so all this gear-head sneering at cheap Chinese stuff you hear from time to time is a bit pathetic. (says I anyway).

They turned out to be perfectly all right, by my standards at least. But they didn't get me close enough!
So I turned to the add on lenses mentioned previously and stuck them on the end of the four stacked macro lenses. . .


So that was a 1x, a 2x, a 4x and a 10x macro add on, plus another cheap add on from before of unspecified strength, and a Raynox, sort of clip on macro lens, the strength of which I can't remember, but must around 10x. It looked a bit bleedin ridiculous, as you can see. The Camera is a Fuji x100 by the way, which has a macro setting but nothing that gets you very close up.


But on a tripod, which is essential with product type shots anyway, the results were pretty much what I wanted. Mind you the beads were almost touching the lens and the camera was casting a shadow which I had to work round. . .
Early days, but I think I can maybe get a style of my own going for slightly more atmospheric supporting shots alongside clearer, more clinical ones for those who want to see details.