Showing posts with label rustic. Show all posts

Tuesday, 22 November 2016

Upcycling and Going with Instinct etc


I haven't has much beading time this last week or two. DIY stuff for the house has temporarily taken over. But if I hadn't been doing house related stuff I wouldn't have pulled some old, patinated and bent nails out of an old victorian bed frame that we got at a local auction, and which I was trying to construct, (without any instructions. . . It all made sense in the end, and hasn't collapsed yet so I think I got it right. IKEA it ain't).

Anyway, said old bent nails struck a bit of a chord with me. I just liked the way they looked so I kept them aside. You get an instinct for stuff you might be able to use. Not a strong instinct, but if you are aware enough, it kind of nudges you from time to time.

I was duly nudged, so next time I was in my workshop I tried threading some left over, or mis-sized beads that I had on my desk amongst the detritus and creative debris, onto the nails. They looked quite nice, so I decided to try to make something with them.

I flattened and widened the top of each nail and then wire wrapped it with a fair few turns of anodised copper wire leading up to a loop at the top, which I flattened a little bit too.
They looked good, so I decided that they would look even better as earring charms or drops or whatever you call them.

I cut a small bit of thick copper wire, flattened each end with my jewellery hammer and drilled a hole in the widest end. I had to use my power drill, which was a bit cumbersome for fine work, but my dremel thing wouldn't have had the required oomph to do the job.
The hole was conveniently the right size for the large copper jump rings I had lurking in my findings box, so I threaded one through the hole. Oh yeah, after I had wire wrapped the other end of the thick copper wire that is. Then I threaded the nail charms onto it, grabbed a couple of ear wires and had a look at what I had got.


I liked them, but was advised by a few knowledgable people to oxidise the copper ring and wire to match the nails and their wire, so I dug out some Liver Of Sulphur that I had bought a year ago and never used.
It worked very quickly and didn't half smell eggy, as it would of course. I brushed a small amount of Renaissance Wax onto the newly oxidised bits as that is supposed to stop it rubbing off I believe. The result is in the top pic in this post.

I like it when I can just follow a seemingly obscure train of creative thought to some kind of conclusion. Following my fascination you could call it. . .
Jon x


Friday, 18 March 2016

Instinct and Round Numbers


Well I've been kind of busy this last week or two, making stuff and generally following the proverbial fascination, like I do, but with a specific aim in mind. I wanted to have 300 items available in my Etsy shop. A bit of an arbitrary figure I know, but a nice, round one. And anyway, it's quite useful to have a target. Helps the motivation.
It started off well, in as far as not selling very much, therefore enabling me to build up the numbers can be called starting well. . . Then at the end of Feb, and through the first ten days or so of March I sold a whole bunch of stuff, which was great, but dented my intention to get to 300. (If indeed you can dent an intention. Whatever. You know what I mean.) Undeterred, I plugged away, making stuff and listing it, and eventually, despite people insisting on buying things, I got to 300! I also got to 300 sales at about the same time, so cause for double celebration.

I'm not sure whether having over 300 items makes the shop somewhat hard to find specific items in and hard to navigate generally. A lot of supply shops have more than that but I'm not a bulk supply shop. Oh well, I guess if someone is interested enough they will trawl through the goods until they find what they want. after all, it's all wonderful stuff. . .

As you can see, this fascination following I have been doing has been quite productive. I haven't prevaricated. I have been letting my instinct guide me and just got on with it. 
For instance, I had been meaning to try my tile beads in actual bona fide, proper square metal bezels, to see how they would look, so I bought a few. I had a tile bead or two hanging a round so I sanded the corners off a bit and stuck it in a bezel. Very nice.


But a couple of blank baked poly clay squares caught my eye and I tried another thing I had been meaning to try for a while. Which was using PVA as a resist. So I painted a simple design on the poly clay square with PVA, let it dry, or rather blasted it with a heat gun as I was impatient, and the heat gun was within arms reach, then painted some indigo alcohol ink onto it. Once that had dried, all I needed to do was peel the PVA off. Only it didn't want to peel off. I picked it off with a finger nail and it had worked fine, the simple design was left white. So I put some more PVA on and painted with a different colour, dried it, picked it off and the result was a rather cool, vibrant coloured, kind of abstract expressionist poly clay square. So I sanded the corners a bit, polished it up and stuck it in a bezel. I also grunged up the bezels with Alc ink and gilder's wax etc, as they were a bit boring left blank, and I wanted to make them 'my' bezels. Not everyone's cup of tea but I like it. A lot actually.

Trusting your instinct is a good habit to try to adopt I think, as when it works, it encourages you to have faith in your creative powers. When it doesn't work you can comfort yourself with the thought that you had the courage to step outside your comfort zone, and each time you do, you learn something useful that staying on the well trodden path wouldn't have taught you.
People go on about knowing when to stop, in the creative process. I think the converse is equally important. Knowing when to carry on, when to keep going and find that flash of inspiration that can turn a seeming disaster into a work of art. Learning from your mistakes and then turning them round. Persistence it's called.


So, encouraged by my success at poly clay squares in bezel making, I used up some more tiles I had knocking around, and worked up some more blank squares into interesting abstracts, either by painting as before, or engraving a simple design and scratching and sanding the hell out of it, selectively. It was fun. I have even made them into simple pendants by sticking each of them on a chain and making a simple clasp. I have put them up in my shop, so we shall see what the consensus from potential buyers is on them.
I was going to write about the other stuff I have been making in my journey to my nice round number but that would have meant an unfeasibly long blog post, and a bunch of bored readers. So I shall bore you with it next time.
J x


Thursday, 10 September 2015

Been a Year. . . Blimey. .


Early stuff

One year ago, I had been playing around with polymer clay for a couple of months, discovered that people made beads with it and got interested in the whole subject of what beads were and could be and what polymer clay could be made to do and be. . . And had started making beads.

Early pod like things

I realised very early on that I had a feel for the more crudely handmade or 'rustic' side of things. Especially when I started to work out what paint and inks and gilder's paste etc could do the surface of said beads. making them look like ancient artifacts or strange tribal beads from somewhere dim and distant.

First sale. I still like these ones. . .

I liked what I was producing and decided to try putting them up on Etsy to see what would happen. I had very little expectation that anyone would buy anything for months at least, if that. And anyway, it wasn't exactly expensive. Amazingly, I sold something within a couple of weeks. Then sold something else. So I took it a bit more seriously and started making more and listing more.


So my shop has been active for a fraction over a year now. I've learned about SEO and Relevancy, well, up to a point, but what I have managed to put in place has helped me get seen in what is a very saturated niche on Etsy. Sales have slowly grown in frequency and I think my work and style is gradually becoming more widely known.


So I'm really pleased that I started on this strange polymer clay adventure. Strange, because it is such a departure from anything else I do or have done, and also strange, because I seem to have managed to get something pretty much 'right' from the get go, which is not my normal pattern of learning.
Let's hope the next twelve months are as interesting.
Jon x

Recent stuff

Sunday, 15 February 2015

Surface treatment - When does 'Distressed' become 'Messed up'?

Is there actually a dividing line? I am really enjoying seeing how close to total irreparable messed-up-ness I can take my image transfer bead 'ageing' process. It's a learning curve, and once you have taken a process too far, you can take a more informed view on how far to take it the next time.

Here's how things start out. Images transferred onto poly clay squares, in this case, using dye sub paper and kato trans liquid. This shot is after baking, obviously. You get a slightly fuzzy, out of focus effect, and some randomly dodgy edges. All of which is fine, as it all adds to the finished look. Neatness can be achieved with more care, if neatness is your thing.


Here's a shot of my desk with some of the above as finished beads, after the 'distressing' or 'messing up', (whichever it is deemed to be) process.


A closer view of the greeny brown ones. Sanded quite hard, as scratching Kato clear is not as easy as plain baked clay. Also, the scratches aren't visible until some darker ink/paint/whatever is applied and encouraged to sink into them.


This is what happens when the process is taken a bit further. These beads are slightly different in that the image trans process was the more usual one using a laser copy/print and water on plain white clay, or a 10% kato trans, 90% white poly clay mix. (Images 'stick' better with a bit of trans clay in the mix).
As there is no liquid clay involved, the surface scratches and distresses more easily. The image comes out sharper than the dye sub ones too. The other thing that happens with this method is that when Renaissance Wax is used at the end of the process, and rubbed in, it starts to dissolve the image. If you apply it carefully and leave it to dry for half an hour or so, it will buff up without too much of the image disappearing, but if you rub it in hard and buff up after a couple of minutes a fair bit of the image is removed. I like both effects. The top left bead has almost entirely lost the image, but looks cool all the same. imho.


These next ones are where it gets close to or over the dividing line between 'distressed' and 'messed up' that I am wittering on about. I like the kind of 'ghost image' of the pattern in red that gets left on the two on the right. This technique does make me wonder whether I should make some beads with no image on them at all, just madly messed up surfaces. I like the look, and losing the image, as in the bottom left bead, doesn't detract from it's coolness all that much. But overall, the ones where the image is still reasonably discernible are my favourites. How 'bout you?


Sunday, 8 February 2015

Hi, my name's Jon and I am a complete pillock. .

Anyone got a link to Pillocks Anonymous? I need to find a local support group.
For why? Well, I just managed to send a buyer a set of orange and black disk beads when actually they had ordered the yellow and silver ones. . I only find out my mistake when somebody bought the orange and black ones today and I couldn't find them. Funnily enough, I did find the yellow and silver ones. . . duh. . .

The orange and black ones

The yellow and silver ones


Oh well, the buyer was very nice about it. I am going to make her a set of very similar beads, as long as I can remember what I did the first time ;-) And the original buyer gets to keep the wrong beads and gets the right beads sent off tomorrow. .

But apart from the display of pillockness on my part, my Etsy shop seems to be taking off in it's own small way. I have sold 8 or so bead sets in the last couple of weeks, which counts as a wild flurry of activity in my world. I'm really pleased. let's hope it continues.

Sold these the day after I listed them. Flippin' 'eck. .

Monday, 12 January 2015

Image Transfer - more musings and more results.


Well, after finally having the time to get stuck in to some Polymer Clay after the new year, I spent a fairly intense day refining my image transfer technique and my faux ancient, fake ageing surface treatment. It seems quite perverse to make a clean, clear image transfer and then trash it with alcohol ink and sandpaper, but the end result is worth it, in my view. The clean originals are just too. . . clean somehow. Also I like the contradiction inherent in making a computer generated image appear to be something dug up from an archaeological site.
From the reaction I have got from various sources, some from artist's who's work I admire very much, it seems I am doing the right thing ;-)


So, I confirmed to myself that a mix of 15-20% trans clay to 80-85% whatever basic clay you are using to transfer the image onto, is best. The image sticks to the clay appreciably better than it does to plain clay and looks a bit clearer.

I'm still not 100% convinced about dye sublimation inks and paper working as well as the lazer print and water technique. But it has it's own look, and it seems to absorb the image into the clay a little bit. Which makes distressing the surface a bit harder, you need to really go at it. . ;-)
I need to experiment with baking times and with transferring onto pre baked clay.

So here are a few of the beads I made.
What do you reckon?
Jon x

Aged dye sub hollow 2cm square beads

seriously distressed, hollow, 4cm round disk beads

dye sub - yellow acrylic ink version


Sunday, 21 December 2014

Downs and Ups

Downs -
Yesterday was a bit depressing. I got some feedback informing me that I had messed up big time.
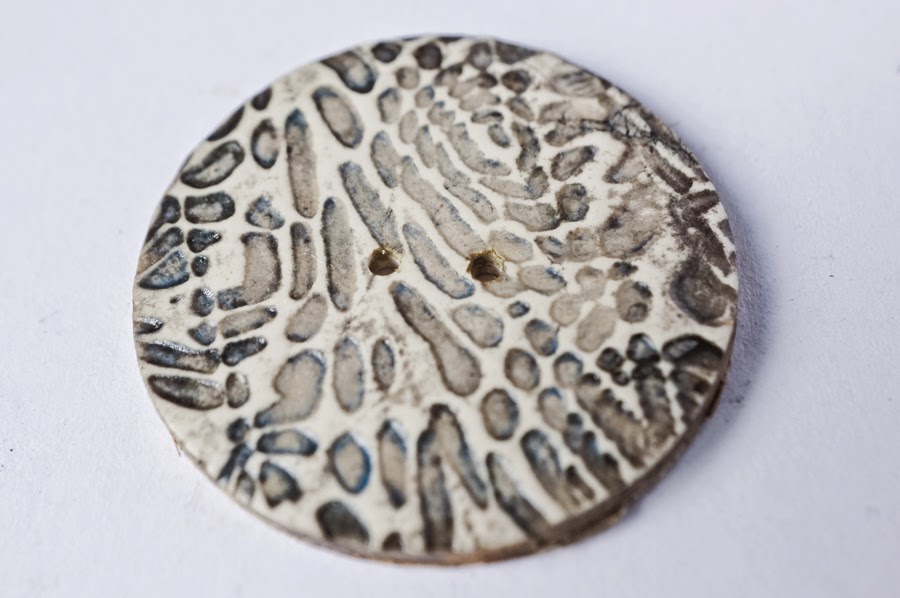
A month or two a go I made some 3cm ish size textured and surface messed with disks as a way of showing my groovy textures. I then had a bright idea, they would make really nice buttons. So I drilled a couple of holes and put them on Etsy. Yay, Buttons! They got some likes and some kind soul bought some.


The trouble was, in my haste to get them out there, and with my concentration on what they looked like, I had overlooked an important thing about buttons and about the durability of polymer clay. Buttons have to be pretty strong, and a largish disk of polymer clay at about 2.5mm thick is not going to be strong enough to withstand the stresses that buttons need to withstand.
Sure enough, they broke and the buyer left a fully justified bad review. I of course apologised and offered a full refund including postage. I felt really stupid and guilty. . . Still do. So I have taken all the buttons I was selling off Etsy and will not offer any more for sale until I know that they are up to the task. I'm so annoyed at myself.

Ups -
This morning I sold a necklace! One of my image trans tube beads ones. Don't worry, unlike my buttons, my beads are solid! And the clasp on the necklace has been vigorously tug tested so that shouldn't embarrass me anytime soon. I sincerely hope!


And a local gallery sold two sets of my glass coasters. That cheered me up. I needed a bit of affirmation to counteract the button fiasco.
Well, onwards and upwards is what I say. .
Jon x

Wednesday, 17 December 2014

An Experiment. . . .

Glass coasters from my Etsy shop

As you may or may not be aware, I have been making and selling framed tiles and glass coasters of my digital designs for a while now. To do this I use a process known as Dye Sublimation to transfer the
printed images onto the tiles or coasters. This involves using heat and pressure via a special heat press, specially coated tiles etc, and special printer paper and inks.

OK, Dye sublimation likes certain kinds of plastics and I was pretty sure that Polymer clay was likely to take a dye sub image pretty well. 
I decided to experiment as I had my specially set up printer and loads of paper, so I printed out a sheet of small images to mess around with. 
What I decided to do was use a disk of unbaked clay to apply the image to, but put a thin coating of liquid clay onto the image so that it stuck to the image and to the clay. The reason I wanted to stick the image to the clay was that I was intending to use a heat gun to 'bake' the liquid clay and transfer the image to it. If the image wasn't stuck down it would end up getting blown away. (I'm too impatient to bake them in the oven, and I wanted to do one at a time to see the results quicker)

So I tried that. I gave the image about one minute with the heat gun on medium. ( my heat gun has a heat intensity dial, which is very useful - Wickes sell that model ) I was careful not to burn it. The image became visible through the paper quite quickly but I kept heating it just to be sure it had transferred. 
I then wetted the back of the image and rubbed the paper off. You can soak it in a bowl of water if you wish, same difference. The clay disks weren't properly baked so I baked them in the oven for about 15 mins or so to cure the clay. The results were very clean and clear.

More or less un-messed with image transfer disks. Just a bot of Alcohol ink round the rim.
Too clean and clear for me ;-) having established that my method worked I decided to get stuck into some surface treatment on some of them. I tried my usual various combinations of alcohol inks, inca gold and gilder's wax in various colours, sanding it off a bit and then adding more, and so on and so on.
They looked nice, but there was no way of stringing them if I wanted to use them, so I made them into the front layer of some circular hollow beads, using the Claire Maunsell method with different sized cutters. This of course required the whole thing to be baked. . .
The trouble was that baking would melt the gilder's wax and disperse or otherwise mess up the alcohol inks intensity. Oh well, couldn't be helped. They came out solidly baked but a bit muzzy and fuzzy. So I used the same alcohol inks that I was painting the back and sides with to paint round the 'frame' of the front image. The resulting beads looked seriously beat up but cool all the same. Like something dug up from some archaeological site, on another planet. . . Which is fine by me.


But not as beat up as my attempts at transferring black and white images onto already baked clay disks. The image didn't stick to the clay as nicely as with raw clay and kept peeling off in an annoying way. I used some 'heat tape' that I use for dye sub stuff to hold it down but that wasn't always successful. I did the same as the beads above, giving them the surface treatment, then deciding to make them into usable beads by sticking another disk of clay behind them and then baking.


These ones look like they've been dug up from an ancient site, thrown off a cliff and then run over repeatedly by a chieftain tank. I like them though.

Next time I shall do things in the right order, but I shall still go for the messed up look ;-)
I might even do a proper tutorial in due course.
Jon x

Friday, 5 December 2014

Black and White


It occurred to me while messing around with my Image transfer stuff, that a simple black and white image might look striking and graphic on a tube bead or two. While pondering this I remembered the images I have been using to make the negatives for my Photopolymer texture sheets, which were conveniently black and white and available. I got some examples printed off at the local copy shop and tried some out.


I thought they came out pretty well. The rounded pattern looked a bit like those African eye beads you see around, but nicely different. I tried some chunkier beads than my usual. I'll try some hollow ones at some point I think, that way they would be lighter.


I still have to work out how they should be presented on a pendant or necklace and what beads they might go with, but I'll mess around until something clicks.

cheers,
Jon x

Monday, 1 December 2014

Image Transfer - more musings

Having been somewhat obsessed with rolling my image mapped bits of clay round tube beads, I decided to change focus for a bit and try using the flat images as just that, flat images. As the designs suggest tiles, and were initially created to echo tile designs in the real world I made what you might call tile beads with them.
I used a technique that Claire Maunsell shared a while back, for making hollow beads using cutters of different sizes, to construct a few square, hollow, double sided tile beads.


Basically, you transfer a couple of images using the water and index finger attrition method described in my previous post, making sure the image is slightly smaller than the larger of your two cutters.Then you cut out a couple of blank squares the same thickness as your image trans squares. Then, taking the smaller cutter, chop out the middle of the two (or more if you want a thicker bead) blank squares. Make sure your image squares are dry and not going to smudge ( I put a coat of Klear floor polish on them ) put the first one face down on your work surface, stack the two blank squares with the centres chopped out on top and finish off with the second image square face up. Gently push together without squashing or distorting.

Make a hole about 3/4 of the way up what will be the vertical side of your bead when strung, on both sides in order to allow string/thong to be threaded through, poke a barbq skewer or suchlike mandrel through the holes to suspend the bead on whatever kind of rack you use when baking, then bake. . .
Being me I had to mess around with them after baking. I painted the sides with alcohol ink and then gently sanded the top and bottom where the ink had encroached onto those surfaces. As they had been varnished and fired the sanding didn't erode the images as long as I was careful, but did take away some of the ink, giving a nice, faux ancient effect.
I'm really pleased with how they turned out and am going to mess around some more with this technique, when I get some time. . .
cheers,
Jon x


Wednesday, 26 November 2014

Image transfer musings


I've spent a fair few hours wrestling with various forms of image transfer onto Polymer Clay over the past few months. I have various (hundreds. . . ) of cool images that I created digitally by various means, that I have wanted to get off the computer and onto any substrate that will take them. Getting them onto Polymer Clay seemed an interesting challenge.
My explorations so far have been aimed at trying to get images onto raw clay that I could then manipulate by wrapping them round things. Most of the brighter and crisper ways of transferring images all seemed to involve baking the clay, or blasting liquid clay with a heat gun. OK in their way but you are left with a stiff, flat thing that is unwrappable.
The only way I found to transfer onto raw clay was the one that Donna Kato mentions in her book on Creative Surface Effects. It involves using a laser print, (it doesn't work with inkjets) and water. Several people have Youtube vids of this technique too. Basically you place the image face down on a bit of clay, rub/burnish the back of it to make sure the image is in good contact with the clay surface, then, using water and your index finger, rub gently-ish until the paper rubs off. This leaves you with the image that was once on the paper, now imprinted on the surface of the clay. There are various subtleties to it but in a nutshell, that's what you do.
What I then tried was to wrap that image around a pre-made tube bead, either baked or unbaked. The problem I encountered was that the image stuck to my fingers and smudged badly. OK, I tried hardly touching the image when wrapping, but that was very hard to do as some pressure and guidance is needed to get the wrap at the right angle etc.
I tried this technique with trans clay. The image stuck to the clay better, and much less to my fingers, but the resultant image looked a bit faded and dull somehow.

Early experiments

So I thought a bit and decided to try a mix of trans and white clay, white for the image quality and trans for the relative handleability. I tried about 80% white to 20% trans. This was better and I got some reasonable results, with the caveat that I wasn't going for anything pristine, I liked the wonky, cheap transfer/ancient artifact/rustic vibe I was getting, I just didn't want smudged images.
On a whim I tried something out. .  I figured that what I needed was something in between the image and my fingers that would protect it from smudging when being handled, so I tried a thin coat of Klear floor polish brushed on. This worked OK up to a point. . .
The issue with the basic laser print/water technique is that when left, over time the ink gets stickier and the clay gets stiffer and likely to crack when being wrapped. Putting a thin layer of weak varnish on helps with the first problem, but not so much with the latter, you have to try to judge when the varnish is dry enough to handle but that it hasn't dried to the extent that it will crack when wrapped.
I have had some success with this but still have to handle it as little as I can as the act of wrapping seems to re awaken the stickiness somehow. It's also not consistent enough for me to draw firm conclusions about what I am doing. I feel it sort of works, most of the time ;-)
Any of you found better methods?
Jon x


Sunday, 23 November 2014

Man Stuff

Somebody on a forum I hang around on said that my work had a 'masculine' vibe to it. I have no problem with that assertion, I don't have much interest in the prettier more delicate side of things.

(Not that I deem pretty and delicate to just be something that interests women, you understand. I draw a distinction between 'female' and 'feminine', just as I would between 'male' and 'masculine'. Pretty and delicate is generally classed as 'feminine' while the more rugged and chunky side of things is generally considered to be 'masculine'. I'll go with the generally accepted view for the sake of convenience if nothing else. All that 'sex vs gender' stuff gets complicated pretty quick so I will back off before I mess up too badly.)

So, my work has a masculine vibe.


An addendum to that remark was that I might consider making jewellery for men.

This wasn't something I had considered, having only recently started making jewellery at all, and not really thought deeply about who it might be for. . . So I had a scout around online to see what was what in the adornment for chaps department.

Well, there's a fair bit of it about. Quite a lot of chunks of grey metal on thick leather thong, sub David Beckham kind of stuff. Not very me. The other end of the scale seemed to be the hippy guy stuff, rough ethnic beads worn in festoons. Fun but a bit too hippy. There's a sort of 'Man of the Woods' style with it's fair share of chunky clay, wood, leather and twisted hessian. But it's all a bit hairy chested for me. ( I had a hair on my chest once, but it has long since departed. I cry about it sometimes. .)
There's also something that categorises itself as 'beach', which seems to be quite simple stones or beads on a simple thread/thong. Quite nice but my nearest beach is miles away, pretty crap as far as surf goes, and freezing cold most of the year, so I can't get inspired thinking of beaches really. (Although, there is a place called California just a bit further away. Trouble is, it's a basically a bleedin great caravan site as far as I remember and nothing even vaguely like the 'real' California. makes me smile to think of the comparison though. It's entirely likely that it was called California way before the other California. . . hah!)

I guess if I were to go down the road of making male jewellery I would want to situate myself somewhere in the middle of all the above. Kind of Surfing Hippy Man of the Woods with sub David Beckham tendencies. (Google that!)
So anyway, I made this.


Any views on it's gender pretensions? I actually wore it round the house to see how it felt and looked. I thought it was pretty cool. . . Your mileage may vary. . . ;-)
best,
Jon

Saturday, 22 November 2014

Dangerous Dancing. .

Well, I felt me age yesterday. There I was, working away at my desk with my iTunes set to 'random', which is a nice way to get an eclectic mix of tunes, the majority of which you will like, when this came on.


Yeeeeeah. . !
It's from an album called 'Intensified' that I had back in the eighties. As I'd been sitting down for hours by then I stood up and stretched my legs. Then I thought I'd try that 'running on the spot in slow motion' type dance that was de rigeur amongst Ska fans in my youth. Like the guy out of Madness used to do. I mean you can't not move to that tune innit?

So I was just getting into me stride when Eeeeek! .  my left calf muscle gave a serious twinge. I curtailed all bopping activity with immediate effect and gingerly flexed my left foot. . . Ow!. . .
So now I can't put my weight on my toe on that side and I'm hobbling about the place. No serious damage thankfully, but it makes you realise A. - How suddenly something can happen that affects your life and how you live it. I can't drive for a day or two, or walk to the shops etc. B. - How often you actually use your calf muscle, going up and down stairs is interesting. . and C. - It makes you admire even more how disabled people cope on a daily basis. Respect!

Oh well, I'll survive, poor old boy. . . Fah!

Anyway, on a happier note I sold three big buttons and a set of small buttons on Etsy, hooray. I shall make some more. . .


best,
Old limping Jon

Saturday, 15 November 2014

An update

Just a quick update on my polymer clay activities for them as are interested in such things and are reading this blog. OK so that's nobody. Well, I'm interested so I shall inform myself of my own activity ;-)

I put Thursday aside as my official Polymer Clay day, as I work hard enough the rest of the week on other stuff, and as I am freelance and work from home, I can allocate my time as I choose. This is the upside of freelance life, and not one I would change for all the tea in China. (partly because I wouldn't have room for all that tea, I would need a VERY big shed, but mainly because I can't see anyone offering me that particular deal, but as they say, be careful what you wish for. .)
So, on Thursday I made a whole bunch of components for possible and probable future projects, such as constructing necklaces.

Here's a pic or two.


From the top, three of my 'unfortunate resemblance' beads, better known to me as 'turd beads'. I shall know better than to make organic looking textured beads out of brown clay and texture them in yet more browny coloured stuff in future. Next to them are some textured disk beads, Below them are some faux 'African' scratched tube beads and some cool round scratch beads.


then some primitive spacers and then some of my image transfer beads, which always turn out just that annoying bit more 'rustic' than I intended. Still, I like them.


I made a possible necklace from various components. This is the sort of thing I want to pursue. Possibly even doing some stuff for men, having had a look to see what is being done in that area on Etsy. Interesting. . .
thanks for reading,
Jon x

Monday, 29 September 2014

What a difference a couple of cheap wire spacer beads make. . .


The thing is, my interest in Polymer Clay has led me into making beads and suchlike, as that is one of the main things it is used for. Logically, I should really try to make the beads into pieces of jewellery and adornment, rather than just hoping people will buy them and use them in their own constructions. 


To this end I got some cheap, but quite nice wire spacer beads and some leather thong to string them all on. It kind of legitimises the beads somehow and makes them look like they should be part of a necklace. I wasn't expecting that really. So, I shall experiment further with this necklace etc making thing. The image trans tube beads came out best.